In Part 2, pro landscape shooters Marianne Lim and Dylan Toh expand further on how being in the right place at the right time is much more about good planning than good luck.
04 Plan with apps
We all need a little bit of help now and then, and there are a few tools that we use often to aid us in our planning. We use The Photographer’s Ephemeris (TPE) and PhotoPills, but there is a great list online that you might want to explore further (http://loadedlandscapes.com/landscape-photography-apps). TPE has been around long enough now that most photographers know about it. In a nutshell, it’s a map-centric web app designed for use on desktop computers or laptops, and it helps with planning by integrating the following features: calculations on sun and moon rises and sets, showing the times for civil twilight, an ability to show street views (much like Google Maps), an ability to save locations and also to share shooting plans. Essentially the user inputs information such as dates, times and locations, and TPE will show you where the light will be, based on that data. It can be downloaded to desktop for free and installed through this link: http://photoephemeris.com and it can now also be bought for both iOS and Android platforms.

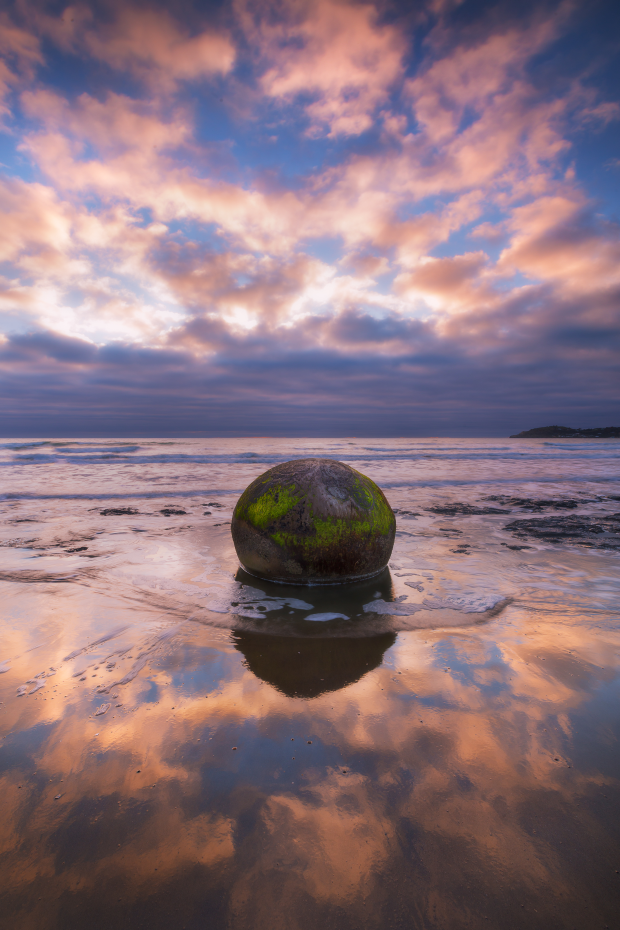
Moeraki Boulders, New Zealand. The sun was rising behind a bank of clouds, which meant that I wasn’t going to get a sunstar on the horizon, but it illuminated a less dense patch of clouds above. As the water receded, there was a small opportunity to capture the reflections on the beach before the next wave. Canon EOS 5D Mk III, 16-35mm lens @ 16mm, 0.4s @ f/16, ISO 50, GND and tripod used. Colour and contrast adjustments in Photoshop CC. Image by Marianne Lim.
PhotoPills is a relatively new app (about two years old), that is much more portable and has significantly more information. PhotoPills is a paid app designed for use with the iPhone and iPad, and it requires a camera to work. Aside from having most of the features that TPE does, it also boasts calculators for hyperfocal distance, depth of field, field of view, time-lapse exposures, focal length match, star trails, plus augmented reality features that will show you exactly where the sun, moon and stars will be at any given time in any given location when you move the device’s camera around! Due to its wealth of information it takes some time to learn, but there are excellent tutorials at http://www.photopills.com which help. At the very basic level, it also generates data like TPE from dates, times and location information. Dylan often uses PhotoPills to plan his Milky Way images; it will tell him exactly where the Milky Way will be at what time of night for his chosen location so that he can be there to capture it.
05 Create a research file or itinerary
Creating a research file sounds like obsessive planning, but the fact is most people already do it. At a minimum you will have a plane ticket with your fly-in and fly-out dates and times! Personally, we like to create a spreadsheet with the dates of our holidays and add our accommodation as well as where we expect to be.
At the very least we can tell our kids what type of environment we will be in (at the beach, or in a rainforest) and it also generates some excitement when we move on to the next “holiday house”. Dylan and I then plan what we might shoot in the area, and thus we have a number of options for any given time. Since we no longer shoot together in the field, this type of planning works well for us. We can choose locations based on weather (or our children’s moods at the time), and it allows us to have some diversity and flexibility in our itinerary. It’s also important for us to have this list as it could mean that we each look for different compositions if we both have the opportunity to shoot a location, or let us know that we need to work a location more thoroughly if only one of us has the single chance.
We also have other things we might include in our trip planning file. For example, it might be noted if Dylan is going to do an overnight hike, or we may have notes from other photographers on locations they’ve recommended, or where the last supermarket is before we head out to a small town!

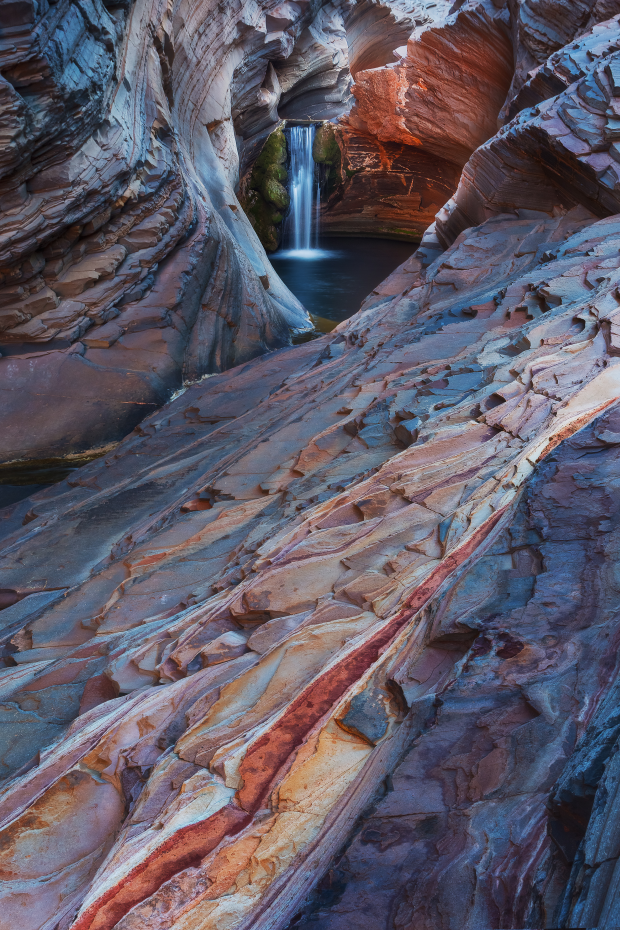
Spa Pool, Hammersley Gorge, Karijini NP, WA. Before we visited Karijini I decided not to look at any prior images of this location. I wanted to see if I could come up with something which wasn’t influenced by other compositions. I saw this reddish vein in the rocks and thought to use it as foreground interest and also as a complement to the rocks near the waterfall. Canon EOS 6D, Canon 17-40mm lens @ 27mm, 1/5s @ f/16, ISO 400, tripod used. Colour, contrast, sharpening adjustments in Photoshop CC.
06 Use social media
Apart from using the internet to Google something, there isn’t a much faster way to obtain information to a specific question than to ask it on social media. Whether that’s through Facebook, photo-sharing sites or forums, you will generally get an answer to your question very quickly, possibly saving you time searching for the answer. What’s more, in the main those responding want to help you with information they have from personal experience or may refer you to someone else who does, and it’s a fantastic way to build a network. You might even score a local photographer willing to shoot the location with you, and that definitely is worth more than any information you might already have collated by other means.
Conclusion
Now you’ve done all this groundwork, it’s time to reap the rewards. Once on location it can be really gratifying when it all falls into place, even more so because you know you created the opportunity by researching and planning it. This simple quote from National Geographic photographer Jim Richardson resonates with me for that reason: “If you want to be a better photographer, stand in front of more interesting stuff.” There’s nothing more satisfying than coming back with a ‘keeper’ from planning your own interesting stuff.
See Part One of this article.


