


In part two of our series on how to shoot better images at night, Robert Keeley shares three more tips to help you extend your creative options when the sun goes down.
Night photography is endlessly challenging, and contrary to what some people might think, the distinctively different light you can discover after the sun sets can really open up your creative thinking. But this requires a different way of thinking, and often more preparation beforehand.
Before you head out at night, it’s best to scout your locations in daylight, then check that you’ve packed personal lights (a headlamp or torch, which you can sometimes use to ‘paint’ light into your scene simply by waving the torch through a longer exposure, but mainly to see what’s going on!), and your camera’s batteries are fully charged.
Perhaps surprisingly, any type of lens can work well in night settings – either telephoto or wide-angles – as long as you adjust the ISO rating to an appropriate level, though whatever you ISO use will likely be much higher than you'd use in daylight. ‘Noise’ can be an issue with higher ISO settings, but these days more consumer-level SLRs have been built to cope with a much higher ISO rating before noise becomes a distraction. Here are some other ideas to consider.
01 SHOOTING A STAGE
One interesting variation on ‘night’ photography is when you get the opportunity to shoot events on a stage. Mostly these events occur at night, but if the performance is indoors time is irrelevant – you’re still working in an extreme low-light situation. Depending on the vibrancy of the stage activity, you’ll probably find it’s worthwhile to experiment with a much higher ISO rating, which will allow you to use a faster shutter speed and still capture a correctly exposed image with sharp subjects.
Shooting stage events can be made much easier if you can get a position close to the action. Faster action requires faster shutter speeds, which invariably means you need to set a higher ISO.
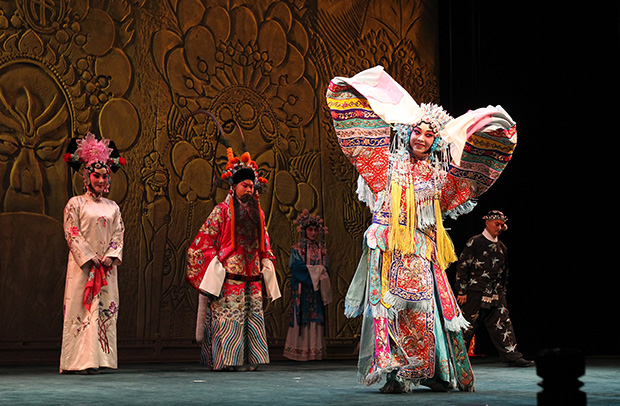
There’s no set ISO rating which will or won’t work in a given situation. But aim to get as close to any stage setting as you can (and remember, it’s worth finding out beforehand if photography is allowed so you don’t get thrown out!). Getting as close as possible has two advantages; you’ll need less telephoto power to close in on the performers, and you’ll be able to crop out more distractions (like the heads of the foreground audience or any stage lighting) simply by zooming in. Of course, these features can also be included in your images, but getting close is a good place to start. Remember that the closer you can get to the performers, the more likely you are to capture their facial expressions as they perform, and the faces tell the story.
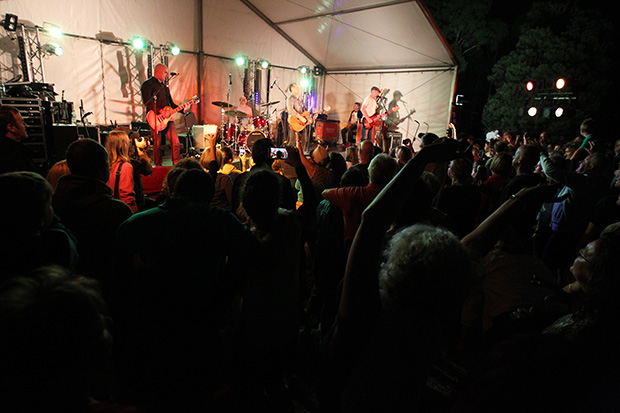
At an outdoor concert I started shooting whilst amongst the crowd. This can be a good strategy if you want to include the crowd's involvment, though at night people are defined largely by their shadows. Try holding your camera above your head. While your composition may be more haphazard, you'll clear your shot of stray arms and mobile phones!

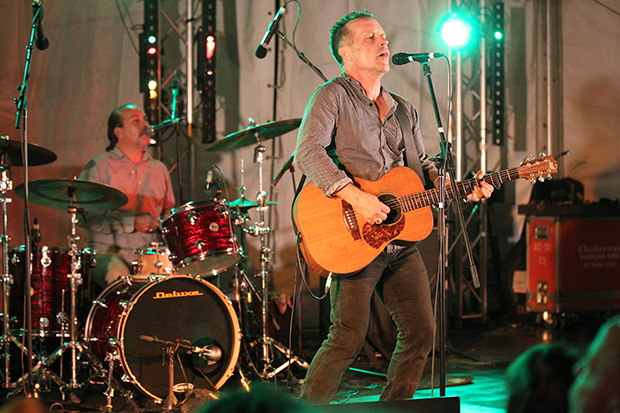
I also moved in closer to capture the whole band. At this position the stage lighting will have a large (and unpredictable) effect on your image. I worked with a high ISO and faster shutter speed to freeze the band's movement. Shot with a Canon EOS 1D Mk IV, 16-35mm lens @ 16mm focal length, 1/320s @ f/4, ISO 4000.
Using a telephoto lens I was able to more tightly crop on the key performer. But you'll also have to put up with the vagaries of stage lighting, which can be distracting if you shoot at an inopportune time.
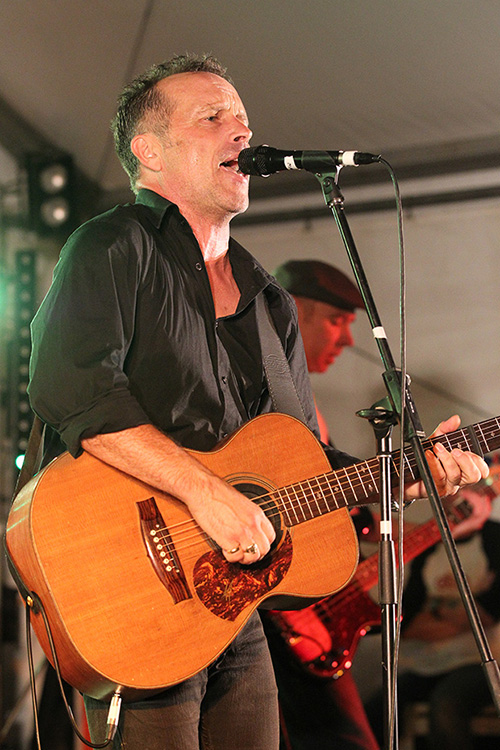
Another alternative is to shoot with a telephoto from as close as you can get to the stage, and compose tightly on each performer. At this point stage lighting will override entirely any darkness beyond the stage. Make sure to shoot with a focus on the performer's eyes.
In some performances the stage lighting will be intense, either throughout the show, or at particular moments. If you have too high an ISO rating you may well blow out the highlights in your shot. Assess the scene when you arrive. ISO ratings are easily adjusted in digital cameras,
Night or low light photography is full of challenges, and you simply won’t get it right all the time. That doesn’t mean you shouldn’t try a different approach.
02 POST SUNSET, PRE-DAWN
Most enthusiasts soon learn the basic photographic rule that you should aim to shoot outdoors images in the ‘magic’ hour leading up to sunset, and in the same period as the sun rises. However, one tip worth acknowledging is that the 30 minutes after the sun sinks below the horizon, and the same period before the sun actually crosses the horizon line, are equally as important and effective for low-light photography. Unfortunately, this is where the hard work comes in! To get to most locations around 30 minutes before the sun actually rises requires plenty of will power, especially during winter when you might not even get a shot after you arrive!

Capturing an image in pre-dawn light requires plenty of preparation beforehand. Set your alarm for at least an hour before sunset, and show some intestinal fortitude in making sure you get up!
You need to set your alarm for an hour before sunrise, have your kit organised and a tripod at the ready, and have either a headlamp or a torch (or both!) ready to go. It requires organisation, as well as will power. But some of the best images by landscape professionals have been taken within these two time zones, which shows how valuable this period can be.
The key here is to be set up and comfortably focused on the task at least 15 minutes before the sun even lightens the sky. To do this effectively, of course, you really need to have seen your location in daylight so you know the composition you want. You can do this anywhere from weeks before to a day before you actually set up. This type of fine low light may only last a few minutes, so the key here is proper preparation in the days (and minutes) beforehand.
03 ALWAYS EXPERIMENT!
Finally, don’t be afraid to experiment. One of the truly great benefits of digital photography is that you don’t waste film when you shoot. The disadvantage of this is that you can start to devalue your images – when it costs something, every frame matters. The advantage of digital is that mistakes can be discarded – but only after you analyse them and learn something from what you’ve done. Don’t delete until you check!

You may - or may not - like this particular image. The point here is to simply experiment and see what happens! It's an image of a lit shoreline, taken during a river cruise with a long exposure, and no tripod.
Once you’ve tried the basics outlined in this series, make sure you start to push your boundaries. That’s the only way to learn more. Try even longer exposures (but be aware your battery might run out of power). Forget the tripod in some situations. Look for different forms of lighting - including torches, camping lights, LEDs, or even headlights! Above all, stay constantly alert to photo possibilities. One of the positive points of night and low-light photography is that artificial lighting usually isn’t going anywhere – it’s mostly been built to stay where it is.
Your opportunities for shooting in the dark never go away, so take advantage of them.