Peak portraiture: Photo tips for better wildlife portraits (Part one)

Comments Comments

Few genres offer the thrill and challenge quite like wildlife photography – capturing the essence of a fleeting moment in nature requires technical knowledge, but knowing how to compose your images is what helps your work stand out from the crowd.

Throughout this guide, we’ll explore the techniques that have helped me create portraits that I’m truly proud of, in the hopes that it can help you achieve the same.

Eastern Grey Kangaroo, VIC. I went out with the intention of creating a unique portrait of a kangaroo, and I was so thankful to have had this connection with an eastern-grey. It was in the peak of summer and she was sitting in the bushes hiding from the blazing heat, peacefully watching as I peered through the shrubs to frame her with the surrounding foliage. Sony Alpha A7iii, FE 100-400mm f/4.5-5.6 GM lens @ 400mm, 1/1600 sec @ f/5.6, ISO 1250.

Get to eye level

Being eye level with the animal you’re photographing is one of the most important composition techniques for wildlife photography – this is always my first step.

Not only does shooting from the animal’s perspective create a deeper moment of connection, but on a more technical level, it also avoids any warping of their proportions and can create a more visually appealing background.

Vervet Monkey ⏤ South Africa. Whilst observing these monkeys in the heart of Kruger NP, I spotted this female who had a very piercing stare. A central frame felt like the obvious choice to capture this intimate portrait of her, showing off her amber eyes and her tiny little teeth. Sony Alpha A7IV, FE 100-400mm f/4.5-5.6 GM lens @ 400mm, 1/1600 sec @ f/5.6, ISO 800.

Sometimes this may be tricky to achieve, especially if you’re shooting from a vehicle or photographing an animal high up in a tree, but remember that the further you are from the subject, the less extreme the angle will be. Sometimes you may need to extend this distance to create the illusion of being at their level.

Try to get comfortable with lying on the ground, crouching, lowering your tripod, hanging your arm out of the vehicle (if it’s safe to do so), and being in awkward positions to create a captivating moment between you, the animal, and your viewer.

Leopardess, Maasai Mara, Kenya. One of my most treasured wildlife encounters to date. We had been searching for this leopard all day but she was hiding deep in a tree canopy. People had reported that she was facing with her back to us, but just as our car drove by, she turned around and looked our way, giving me a few brief seconds to reposition myself in the car so that I could frame her with the surrounding branches. A moment I will truly never forget. Sony A7 IV, FE 100-400mm f/4.5-5.6 GM lens @ 400mm. 1/1250s @ f5.6, ISO 5000.

Look for leading lines

When scanning a scene and constructing my compositions, I’ll often search for winding roads, branches, natural earth patterns, a meandering river (sometimes even a rainbow), that can guide the viewer on a journey through the scene to my chosen subject.

Strategically positioning these natural guiding lines to lead the eye to the main point of interest is a powerful way to contribute to the overall narrative of a photograph – making sure that it guides the viewer into the frame and not out of it.

Black-chested Snake Eagle ⏤ Maasai Mara, Kenya. The thing that drew me to this eagle’s position was the way that the branch acted as a natural leading line. Using the rule of thirds to place the eagle on the opposite corner to the branch felt like the perfect way to balance the frame. Sony Alpha A7IV, FE 100-400mm f/4.5-5.6 GM lens @ 400mm, 1/2000 sec @ f/5.6, ISO 200.

Due to photographing wild species that can move at any given moment, there is certainly an element of luck involved, but if luck is on your side, it often just takes a change in your angle to line the elements up in a powerful way.

Remember that you can always accentuate and strengthen these lines in post-production by playing with Lightroom’s selective masking tools.

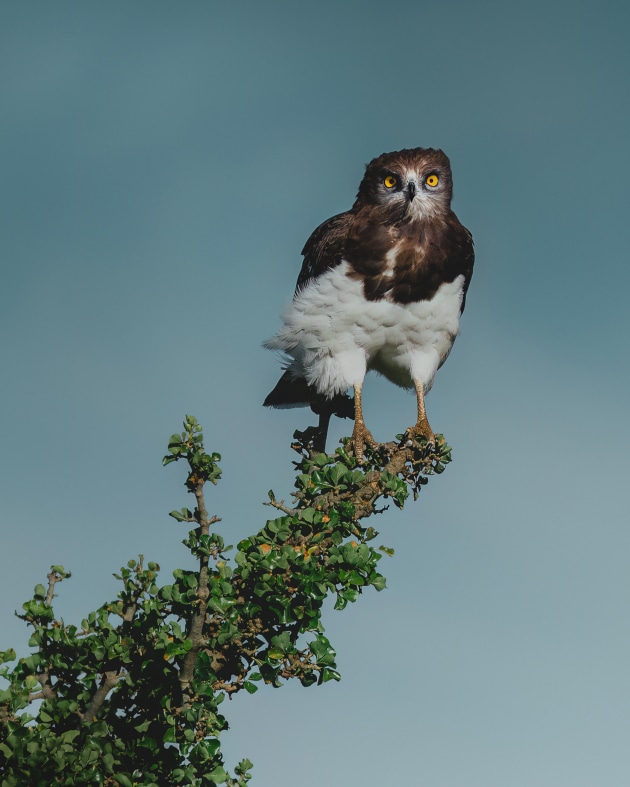
Frame with natural surroundings

By using natural elements such as branches, rocks, foliage or long grass to frame and isolate the main focal point, it adds a sense of intimacy; as if the viewer is peering into a private moment within the animal’s environment.

Search for angles that involve objects in their habitat that can create a natural frame and add further dimension to a scene.

We were driving through a conservancy on the outskirts of the Maasai Mara, Kenya, when I spotted these zebras and a single giraffe resting in the shade of an acacia. I asked our driver to position the car so that the giraffe was in the centre, and by shooting at 10 fps I was able to capture its tail in action, which adds a sense of character to the image. I call this one “a unique ungulate family portrait”. Sony Alpha A7IV, FE 100-400mm f/4.5-5.6 GM lens @ 168mm, 1/1000 sec @ f/5.6, ISO 100.

If the animal is in a tree or dense shrubbery, it can take some extra adjustment to perfect the framing and focus, but the depth it creates is worth every bit of extra effort. This technique can also help to eliminate any clutter from the foreground that can be distracting to the overall image – a win-win.

Remember the rule of thirds

The general premise of the ‘Rule of Thirds’ is to divide your frame into 9 equal sections (thirds, both horizontally and vertically) and line up the important parts of the scene into one of the sections or the point in which the lines meet.

This is said to create a more visually appealing composition that can be very useful when photographing wildlife.

Spectacled Flying Fox ⏤ Far North Queensland. From our campsite in the heart of the Daintree Rainforest, I could see that a few flying foxes were soaring in and out of a flowering tree at dusk. I patiently waited for one to take flight in front of the foggy forest backdrop, making sure that I allowed ample negative space for it to soar into the frame. Sony Alpha A7iii, FE 100-400mm f/4.5-5.6 GM lens @ 200mm, 1/2000 sec @ f/5.6, ISO 1000.

When applying this technique, turn on the grid in your camera's viewfinder to help you compose your shot, or try to envision it in your mind when shooting.

I find this particularly useful when photographing environmental portraits, moving animals, or even side profiles, as I can line up the eye (or the most important focal point) into one of the intersecting lines/sections.

Look out for part two next week. 

About the author: Kate Newman is a wildlife and conservation photographer from Melbourne (Naarm), specialising in capturing portraits of the wild and celebrating the beauty of nature. See more at katenewman.com.

comments powered by Disqus