Photo tip of the week: how to make a starburst effect
Darran and Julia Leal offers photo adventures around the world. From Antarctica to Africa, Europe to Asia and beyond. Explore their website for this and free tips and techniques - worldphotoadventures.com.au
I’m surprised how many times I'm asked how I get those lovely images shot into the sun, and in particular the star burst effect. I hear all sorts of formulas, but to be honest, the easiest way is to simply point your camera and shoot. Of course, this is an oversimplified comment, so lets look into more depth at what effects you can get, and why and how you can maximise this very creative use in your photography.
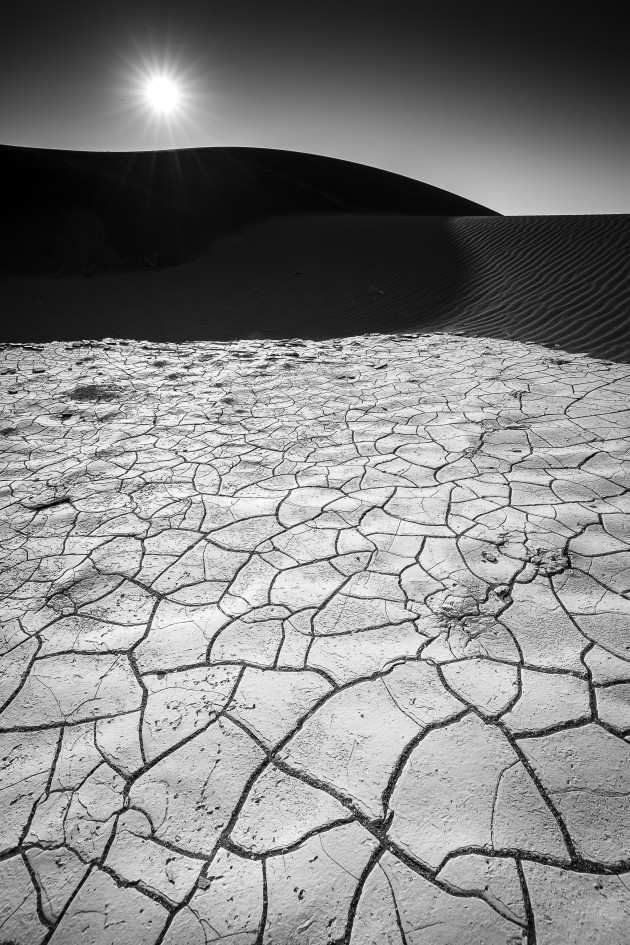
Our modern camera meters, regardless of the brand, are incredibly good at averaging out the difference from highlights to shadows. What was once a hit or miss system and invariably required multiple different exposures to guarantee a result, can now create a great result with one shot. A few points allow for this, starting with the meters built into our cameras - another is the range of detail our modern sensors can capture and finally, fantastic and simple programmes to process our images like Adobe Lightroom.
However, other factors come into play when you want to shoot into light. Have you noticed you can see unusual colour shapes and effects when shooting into a light source? This is most prominent into the sun. One effect that I love to use to my creative advantage is the ‘Star Burst Effect’ (SBE).
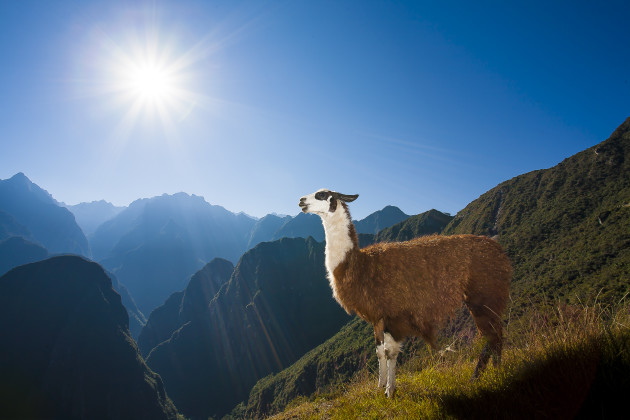
What causes the star burst effect?
In simple terms - the star burst effect is caused by light, in particular a point of light, entering your lens and diffracting. That is - diffraction is the slight bending of light waves around small obstacles and the spreading out of light waves past small openings.
In the case of photography, light enters your camera through a small opening, the aperture, it bends around the edges of the aperture blades and creates the “star burst” look.
So technically speaking, the smaller the aperture, (like f/22) the more emphasised the starburst. (Note: I rarely use such an aperture.) This applies during the day as well as during the night, so is worth considering if you want to use the same effect on streetlights.
Another important aspect of SBE is the focal length of the lens you use. The wider the angle, the more prominent the SBE. So focal length and choice of aperture all play a roll. There's also a few other points.
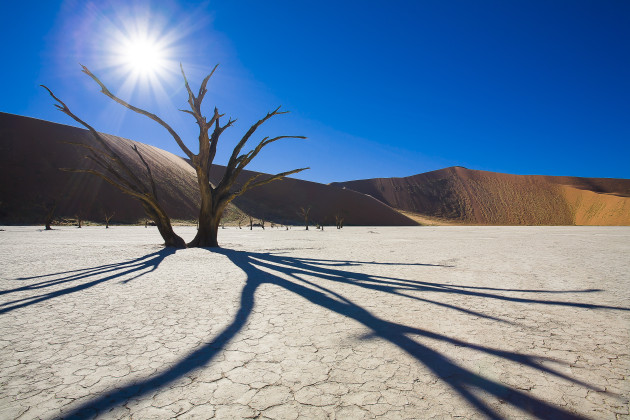
For me it's the super wide angles lenses that display the best SBE. I generally use a 16-35mm lens, which is equivalent to about 10-20mm on APS-C size sensors. If you can, try to use as short a focal length as possible - the most common focal length to use when aiming for SBE is about 50mm, which works out to around 30mm on smaller APS-C and similar sensors.
In theory, cheaper lenses will offer more lens imperfections including less clear SBE and increased flare and other imperfections. Flare occurs when shooting into a light source, especially towards the sun.
In your photos you may see coloured and multi sided shapes emanating from the centre of the sun. This is one form of flare. This also occurs with bright lights like those in the street or in your house. In recent years, Photoshop has allowed photographers to take out these ‘reflections’ and it has also allowed you to add them in. Can you believe it? Now some people love flare and other imperfections. My son Pearce has been published in several magazines aimed at people 20-30 years old. These magazines love images that are processed for a more natural look and yes, they love flare! He has the best lenses, but is happy to show the faults of the lens. All lenses, no matter what their price, have faults.
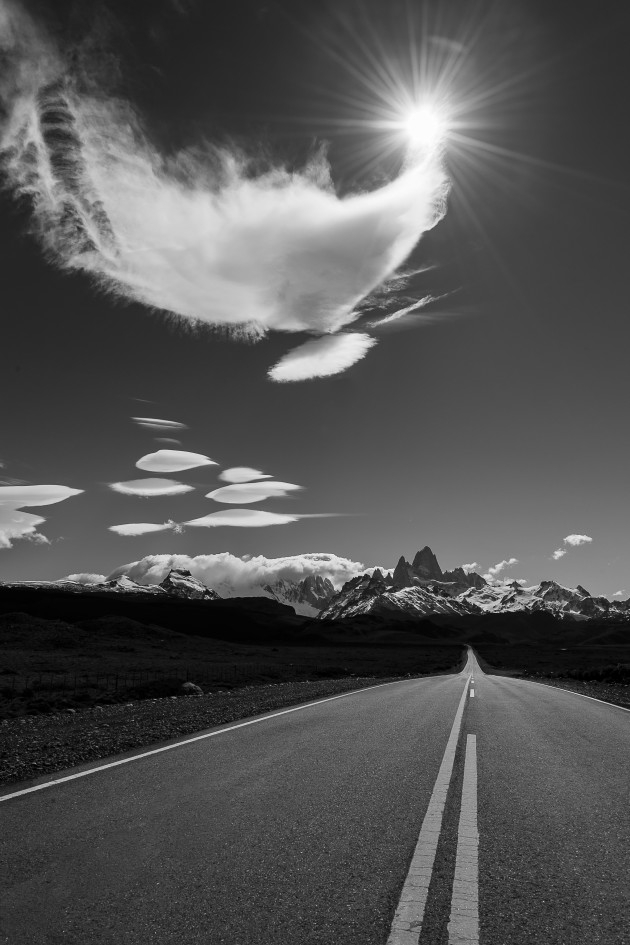
The other form of flare is generally a secondary effect that is widely distributed across the image and thus not always easily visible. It will reduce contrast and image quality. Lenses with large numbers of elements, such as zoom lenses, tend to exhibit greater lens flare, as they contain more surfaces at which unwanted internal scattering or reflections occur. It can be reduced by using a lens hood or other shade, like your hand.
One form of flare is specific to digital cameras - ‘Diffraction Artifact’. With the sun shining on an unprotected lens, a group of small rainbows appears. This artifact is formed by internal diffraction on the image sensor, which acts like a diffraction grating. Unlike true lens flare, this artifact is not visible in the eyepiece of a digital SLR camera, making it more difficult to avoid. I personally don't worry about most of these ‘effects’ and with subtle changes of camera position and angle, can even use the effects to my advantage. Occasionally, I will touch out flare if it is too far from the light source, or is a distraction to the final look of the image.
2) Think about the weather
Cloud, fog, and smog can all affect your result, especially when shooting into a light source. This is because the source of light is either diffused or more spread out and will stop the best diffraction occurring. The opposite can be said for very clear air like in Antarctica or in a desert. The clear air will optimise diffraction in the lens.
3) Pick your time
Early morning or late afternoon may also affect your result. When sunlight travels through the earths atmosphere, dust particles and moisture affect the light before it meets you. This is why you may shoot in one location for a result you like and find the very next day, at a similar time, does not offer the same result. A combination of timing and atmospheric conditions will rarely offer the same result twice.
Remember that looking into the sun can be dangerous. It will not damage your camera, but can damage your retina and cause future eye health issues. Make sure you limit your time looking into the scene with the sun and do not look directly at it.
One of my favourite recent SBE images was shot in Namibia. It was taken before sunrise, using moon light. The result is an image that some viewers think is a daytime image with a SBE from the moon. Street scenes are probably the most common time to see SBE and shooting after rain can add even more interesting results.
4) Set and forget
In theory, you can use any mode and any aperture/shutter combination to get a result. My favourite is f/11 and occasionally f/8. I have heard of photographers teaching that f/22 is “a must set aperture”. This is not true and creates issues with slower shutter speeds and a general lower success rate. I guarantee that setting f/11 for many such shoots will offer you a great result and more creative options, and will also give you a better understanding of the final look and technical issues.
I also use the keep it simple principle of Aperture Priority for the majority of shoots. I set the aperture and the camera sets the shutter speed – easy. We are in the 21st century after all! Any variables are often subtle and easily adjusted in seconds when processing.
5) Spend time on composition, not the camera
I feel this is the most important point to the success of shooting into light. It is less relevant which camera you use and with which lens. It is also less relevant which aperture you use. If you can't shoot a well balanced, lovely looking image, then you will not achieve great looking results. Try and find a great story image that works with the light source and backlit subjects. Try visualising the result you want. The most creative photographers, are those that can visualise the result before shooting and then apply simple techniques for a unique result.
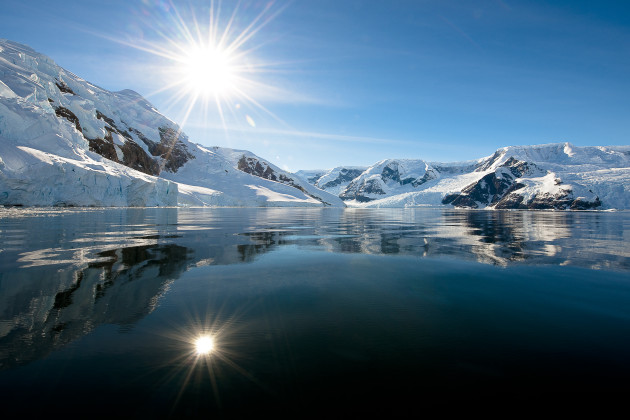
Look for line, form, shape and contrast to add to your SBE opportunity. These four combined, by themselves, or as opposites can offer unique creative results. I will also often use something to partially block the sun when shooting directly into it. This could be a tree top, a building, rocks etc. I start by blocking the sun and then moving slightly to allow the first rays to be seen in the viewfinder. It offers a very cool SBE.
Don’t be shy to shoot into the sun or a light source. Your own backyard is not a bad place to start, or perhaps down at the beach. Aim to add foreground interest and balance this with the light source. For me, this is where a super wide angle lens becomes a powerful creative tool. And don't forget to keep it simple!


