Photo tip of the Week: Street photography 101 (Part one)
This is the first part of a two part series on street photography. Look out for part two, next week.
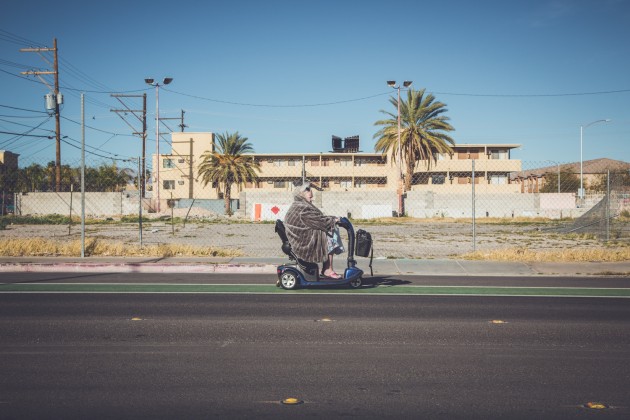
Street photography has seen a massive resurgence in the past few years, and for good reason. At its essence, it’s one of the most accessible, yet rewarding genres of photography.
There’s no pre-production, no lugging of studio lights, no set design, styling, hair or makeup. The gear is simple - no huge telephotos, no tripods, and hardly a whiff of post-production. Nine times out of ten it’s just you, a very basic camera set up, and tons of patience. You just go for a walk or drive with your camera, and wait and see what happens.
In a way, street photography is a bit like fishing. It’s largely stress free, and a typical street photography ‘mission’ will have anticipation, randomness and hopefully a reward at the end. But at the same time, and just like fishing, you always remember the ones that got away. You’ll miss focus or get your settings wrong, have a person blinking, or just shoot something that doesn’t look right.
I’ve been shooting the streets for more than 25 years, and I’ve learnt a lot along the way. So, consider this your crash course in the art of street photography.

Familiarise yourself with your camera (and shoot manual)
I liken my camera to a Playstation controller. When playing video games, you don’t even think about which button to press - it’s all intuitive and instinctual. You need to get to that same level of familiarity with your camera so that you can spin the right dials with exacting precision and shoot as fast as you think.
Spend time while watching TV or a film just holding your camera. Get used to its weight and its framing with different lenses. Understand ‘subject to camera’ distances, the ‘centre weight focus points’, the auto eye detection menu (if you have it), and how to aim from the hip.
Automatic exposure settings are pretty accurate these days – but I find that they are only about 80% correct. If you are shooting under extreme conditions such as uneven lighting or with a backlit subject, or in deep shadows or bright highlights and using high ISOs, it is easy for the camera to get the wrong exposure. Even half a stop can ruin a shot, and the higher your ISO, the less flexibility you’ll have in post.
I like to use what I call the three second rule. When shooting in manual, it should only take a maximum of three seconds to correct your settings.
When you leave your house, have your camera ready to shoot with an average setting for that time of day. It means that if you need to spring into action, you are only three seconds away from selecting the perfect exposure. For example, if it’s the middle of the day and you had your camera set on ISO 6400, 1/60s @ f2 from the night before - it can take up to 10 seconds to reconfigure and do a test shot, and by then the moment will be over. It’s rare enough for the stars to align for a great street photography shot – it’s even rarer to successfully get a second chance to get it right.

Don’t be worried about high ISO
Of course, you should always attempt to shoot as low an ISO as you can. But the thing that always trumps noise is sharpness. You can have all the ingredients of a great photo – but if it is not sharp or in focus, you have nothing. Most modern cameras can easily shoot ‘cleanly’ at ISO 3200-6400. Shooting higher than that, noise becomes less manageable.
But if your image can’t be taken unless you are pushing ISO 51,200 – then think about displaying the image as black and white so that ugly noise suddenly becomes just like old school film ‘grain’. Which brings us to…

Shoot in B&W
Cityscapes are full of highlights and shadows, mismatched garish colours and lights of different colour temperatures. Shooting in B&W can be more dramatic and (new word alert) texture-full, while stripping away distractions and unsightly busyness. So, shoot in RAW and if need be, go into your camera menu to ‘picture style’ and select ‘monochrome’. It will appear B&W in your viewfinder (if mirrorless) and on your rear screen after capture.
With RAW you will always have the option to change it back to colour in post if need be. It may also appear initially in Lightroom as a B&W – but just change to RGB / colour.

Lens Selection
A fast 35mm lens (f1.4 – f2) is the best for street photography. This is because it forces you to get close to your subjects to make the viewer feel like they are right there with you on the street.
At the same time, 35mm is not too wide so that your subjects look too small or your image looks like a landscape photo. It’s also more forgiving than something like a 50mm which can be harder to get pinpoint focus on moving subjects, especially with wide apertures in low light. Zooms can do the job of course, but they are usually too bulky and heavy, too obvious and too slow – especially if it is an f4.
If you are in a car, a 24-70mm or even a 70-200mm is fine as you can sit them in a camera bag on the passenger seat. Don’t take this all as gospel – but really, just go and get a fast 35mm lens.

Keep it low key and shoot from the hip
Generally, a large DSLR with a pro lens can be a confrontational object to members of the public. People think of them as a serious professional photojournalist tool – while a camera such as a Fuji X100V looks like a cute vintage film camera, yet it can still create super high-quality images.
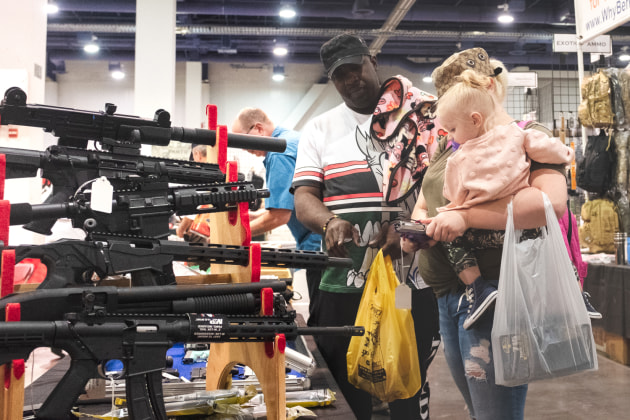
You would be surprised at how people’s attitudes change depending on the camera you are carrying. At my first gunshow in Las Vegas I took my Canon 5D Mark IV. It wasn’t long before I had a bunch of gun enthusiasts getting in my face saying I was with the ‘fake media’ - the hate was palpable.
After the threats and intimidation to cajole me into erasing all my images subsided, one scary guy started following me around. I placated him somewhat by befriending him, telling him my story and ultimately going back to his display table and admiring his collection of killing utensils for sale.
In hindsight, I should have just used my ‘cute’ low key Fuji as it attracts a totally different kind of attention. The other thing I aim to do is not dress too loudly, pompously or like a street punk, as any of these styles of outfits will either attract undue attention or inherent worry and mistrust from the general public, thus eroding your chance of any decent candid shots further.
When it comes to shooting, you can get some great candid photos by just shooting with your camera hanging waist high from your neck or shoulder and your hand just resting on the shutter button (set to silent shutter). Bringing the viewfinder up to your eye often looks too obvious, purposeful and intrusive.
About the author: Tim Levy is an award winning Sydney based freelance photographer, writer and teacher who has covered a multitude of photographic disciplines. His professional work has seen him cover over 25 years of music gigs, portraits, football (the real one) tournaments, dog calendars, travel, shoe photography, Film and Television and everything else in between. His personal work centres around Street Photography with which he has put on numerous solo and group exhibitions.


